Rugby is a thrilling and exhilarating sport, requiring the collaborative effort of each team member in order to be successful. The game consists of 15 players on each side, with each having a unique position and responsibilities on the pitch. When wearing jerseys, the numbers on the player’s backs will determine where they are located on the field.
What are the main positions in rugby? Rugby positions explained
Contents
Rugby Player Positions
Rugby is a thrilling and exhilarating sport, requiring the collaborative effort of each team member in order to be successful. The game consists of 15 players on each side, with each having a unique position and responsibilities on the pitch. When wearing jerseys, the numbers on the player’s backs will determine where they are located on the field.
Rugby Scrum Players
Rugby scrum players are athletes who take part in one of the most physically demanding positions in the sport. They require strength, agility and teamwork to compete at the highest level. The position involves 8 players from each team locking together and pushing against one another in an attempt to gain possession of the rugby ball. This physical battle is a crucial part of play for many rugby teams, as it is necessary for gaining territory on the pitch and advancing upfield towards the opposition’s try line.
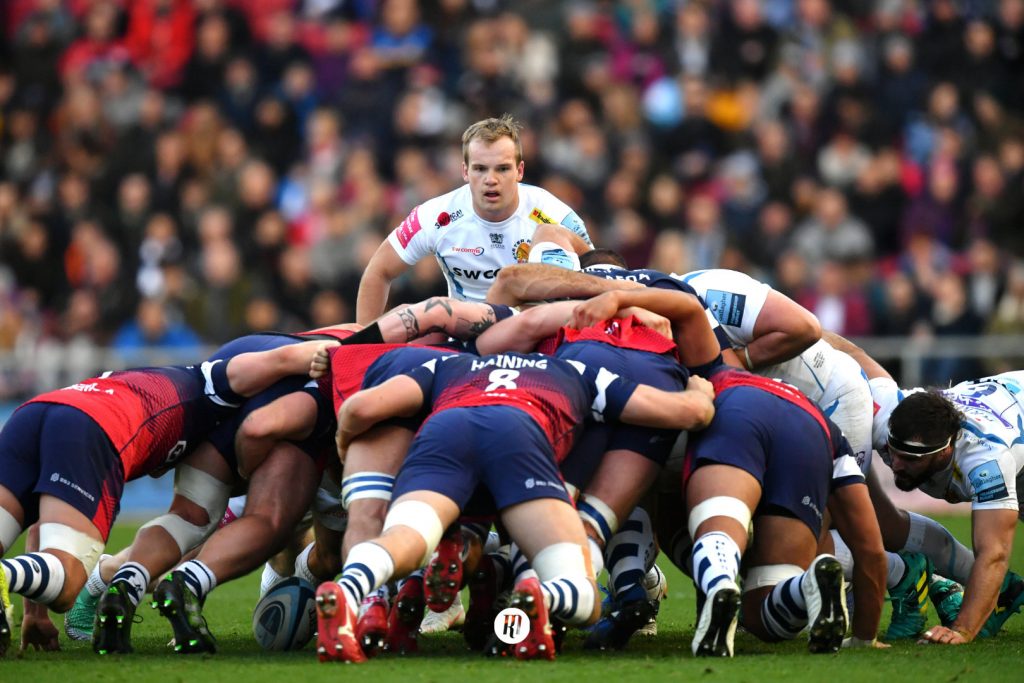
Scrum players must be able to rely on their teammates to provide a solid foundation, while also having exceptional strength and coordination to maximize their effectiveness in this highly competitive situation. Their technical skills must be paired with powerful leg drives and impeccable timing if they wish to succeed against opponents of equal or greater ability. When performed correctly, scrummaging can be a highly effective strategy that can give a team an extra edge over their opponents, helping them secure victory on the field of play.
Props: #1 and #3
Rugby scrums are among the most iconic elements of the game and involve two sets of three players, known as Props #1 and #3. The primary job of a Prop is to support the other players in the Scrum by providing stability and strength while they attempt to gain possession of the ball. In order to effectively do this, Props must be heavily built, strong and have good core stability. Props typically have shorter legs than other positions on the rugby field and require low levels of agility.
Prop #1 is generally considered to be the most experienced member of the Scrum as they are responsible for setting up engagements with opposing players during a match. This requires them to be adept at reading their opponents’ body language, assessing their weaknesses and exploiting them when necessary. Additionally, Prop #1 will look for opportunities to drive forward onto opposition players to disrupt their play or gain ground for their team.
Prop #3 is often referred to as ‘the anchor’ due to their role in providing anchorage for their team’s scrum pack by bearing much of the weight during an engagement with another team’s scrum pack. Unlike Prop #1, they should remain relatively stationary while applying pressure; both backwards towards his own team’s goal line or forwards onto opposing players. Their job is to maintain a solid platform which allows other members of the pack to get into position quickly in order to retrieve the ball or drive forward.

In order for Props #1 and #3 to execute these roles effectively there are a number of physical skills that need mastering such as proper weight distribution through the use of good foot placement techniques while engaging with an opposition scum pack; as well as perfecting body angles during push-ups in order to maximize power output from each player safely without putting strain on any specific body parts. Alongside physical attributes such as strength and agility, Props must also possess excellent communication skills in order for them to understand calls from coaches or other members of their scrum pack so that they can react accordingly when necessary. Without this level of communication between all members it would be impossible for a scrum pack to execute its duties efficiently which could ultimately cost a team crucial points during a match.
Hooker: #2
The hooker is an essential part of the rugby scrum, and is the player who binds into the middle of the front row. He is positioned between the two props, and is responsible for providing a secure platform for the ensuing set piece. The hooker’s main job is to put pressure on the opposition’s tighthead prop by attempting to hook the ball back with his feet as it comes out of the scrum. He also needs to be aware of all activity going on around him in order to make sure his team has the best chance of winning possession.
The hooker is known as number 2 in a rugby scrum and plays a crucial role in its success. His key responsibilities include binding onto one prop each side, ensuring he maintains a stable base for his team throughout a scrum engagement. It is also necessary for him to use his feet to push off from either side whilst simultaneously positioning them correctly in order to provide maximum power when pushing against an opposing pack. Furthermore, he must use good communication skills with his props so that they know exactly what he wants them to do with each push.
The hooker must also employ tactical awareness during a scrum battle as they need to keep their eyes open at all times, keeping an eye out on where their opponents are trying to move towards or away from and using positioning to counteract this movement accordingly. This will help create space for other players or make sure that the opposition cannot easily win possession back from any breaks in formation or angles of attack. Furthermore, hookers are required to have strength and agility not only in their upper body but also in their lower body muscles so that they can produce enough force during every push which will enable them to take advantage of any opportunities which present themselves during play.

An important skill for hookers also involves decision-making; being able to decide whether it’s bestiality hold onto possession or relinquish it should something go wrong at any given moment. They must be well aware of when they can safely drive forward and when they should just hold position depending on what their team needs at any given time – such decisions can often decide who wins possession at any stage during play and thus having this acumen will prove invaluable for any hooker looking at making an impact during games.
In addition, great hand-eye coordination is essential since it allows them both catch passes accurately as well as be able hit targets accurately when passing – something which can be difficult with large amounts of pressure coming from opposing packs but having developed technique here will allow potential openings within defences since defenders won’t know always know exactly where your passes are coming from or heading towards if you have perfected accuracy here even under duress!
Finally, physical endurance levels must match up with those found anywhere else on the pitch due largely down do the increased workload placed upon numbers 2s – not only do they need grit and determination during prolonged battles within scrimmages but they often fly round pitches making last ditch tackles or putting themselves into danger so being able withstand these activities over long periods becomes integral in succeeding as a quality number 2!
Locks: #4 and #5
The locks in a rugby scrum, numbers 4 and 5, are specialized positions that require a variety of skills and knowledge to be successful. These two players have the crucial task of providing stability and structure to the scrum, as well as ensuring that forward momentum is maintained when the ball is being moved. This is achieved through their physical strength and power as well as their positional awareness within the scrum.
Locks generally stand at the rear of the scrum but remain in front of the other forwards so they are able to move freely around the field. The role of a lock must include an understanding of how their positioning affects their teammates’ ability to move and gain possession of the ball. They must also be aware of their own positioning relative to their opponents’, so they can anticipate any potential moves or strategies they might employ. In addition to this knowledge base, locks must also possess good technical skills such as ball handling, passing, kicking and team communication to ensure success in this position.

The locks are usually some of the biggest players on the field due to their need for strength and power when driving forward with the ball or competing for possession during a tackle or maul. This size advantage can give them an edge against opposition teams if used correctly; however it also means that they need considerable endurance in order to remain effective throughout a full match given their involvement in almost every phase of play. Although locks may look like intimidating figures on the pitch, some would argue that it is often forgotten just how important these players are for maintaining a successful scrum set up.
The combination of size, athleticism and technical skill needed from locks make them one of most diverse positions within rugby union today. Locks need great stamina alongside knowledge about different techniques which allows them to stay up-to-date with modern trends in rugby union strategies and provide stability both offensively and defensively for any successful team on match day. The importance placed upon these two players should never be underestimated given what they bring to not only any scrum but also an entire team’s performance throughout a game.
Flankers: #6 and #7
The two flankers, numbers 6 and 7 in a rugby scrum, are some of the most important players on the field. Both flankers are positioned in between the two forward packs on either side of the scrum. They play a pivotal role in both defending and attacking moves. In defense, they are responsible for disrupting opponents’ attacks by putting pressure on their opponent’s ball carriers. Meanwhile, they are also capable of providing support during offensive plays while helping to create gaps in the opposition’s defensive line up.
Flankers have to be physically strong, agile and possess good tackling skills as well as being able to make quick decisions under pressure. As such it is essential for them to have excellent communication skills in order to coordinate with other players around them to ensure that everyone is working together effectively as a team.
In attack, flankers will attempt to gain possession of the ball from any member of the opposition team who has it or from any kick off or lineout situation that occurs during play. They must then run with the ball whilst avoiding opponents at all costs. Once they reach their destination point they must pass or kick the ball towards teammates in a controlled manner so that they can start an attacking move against their opponents.

As well as being able to run with the ball themselves, flankers often help set up rucks by tying down opposition players while teammates pick up the ball and carry it forward towards their tryline. This helps teams make progress without having to risk too many people getting injured or being sent off due to foul play. It also means that other members of their own team can stay fresher for longer throughout a game as they don’t have to expend excessive amounts of energy trying to break through opposition defensive lines alone time and time again.
Therefore we can see how important roles these two flanker positions have within rugby scrums; not only do they provide an invaluable link between the forwards and backs but also consistently put themselves at risk in order for their team mates to get ahead when attacking or defending against their opponents – making them some of rugby’s most hardworking players!
The 8-Man: #8
The 8-man #8 is an important position within the scrum, and although it is often overlooked by casual spectators, it plays an integral role in the effectiveness of the formation.
The #8 stands at the back of the scrum, directly behind the front row. His job is to bind onto his fellow teammates in the front row and help them to create stability. Without this support, even strong front rows can be pushed off balance by their opponents and will struggle to maintain their footing and provide secure ball possession for their team’s half-back. He also acts as a link between forwards and backs during attacking play. This means that he must possess good passing skills and be able to provide quick service for his backs without giving away possession by passing too early or too late.
In addition to providing support for his team’s front row, an effective #8 will also take part in both attacking and defensive play. He should be able to pick off opposition passes with high accuracy and disrupt opposing runners who attempt to break through gaps in their defensive line with strong tackling. As well as these defensive duties, a creative number 8 will also look for opportunities to carry ball forward himself either through carrying it up-field or passing it out wide if space opens up ahead of him.
In order to do all these tasks successfully, a #8 must have a combination of strength, agility, physicality, and technical skill – traits which are rarely found in one player alone! Successful rugby players usually need years of training before they gain experience in all aspects of play required from this position but when they do reach peak performance levels many believe that they are among some of the best athletes in any sport.
Finally, since so much responsibility rests on his shoulders during scrums, rucks and mauls then it is only fitting that a successful #8 takes great pride in leading from the back – inspiring his teammates to perform better as one cohesive unit rather than relying on individual performances alone. After all; its teamwork that makes dreams work!

Rugby Backs
Rugby Backs are the players that usually receive or move the ball during a rugby game. They can play a number of different positions such as wingers, fullbacks, centers, and fly-halves.
Rugby Quarterbacks: #9 and #10
Rugby Quarterbacks, also known as fly-halves or scrum-halves, are some of the most important players in a rugby team. They are the field generals responsible for orchestrating and leading their teams to victory by making strategic decisions throughout the game.
The first quarterback position is occupied by the fly-half (#9) who is typically the team’s main kick and decision-maker. The fly-half is typically positioned at the back of the scrum and must have superb vision in order to make quick decisions based on what they see happening around them. An effective fly-half with good kicking skills can be invaluable for a team since they can put pressure on opponents when necessary, as well as score points by putting ball in play effectively.
The second quarterback position is occupied by the scrum half (#10). This player usually plays at the base of a scrum and is responsible for retrieving possession from opponents following a tackle, ruck, or maul. They also need to distribute accurate passes quickly to other players while under extreme pressure. The scrum half must have excellent communication skills in order to direct their team’s movements during attack and defense while maintaining control over possession.
In addition to being field leaders, these positions require each player to have an incredibly high skill set that includes physical strength and fitness, tactical awareness, speed and agility, mental tenacity, and good ball distribution skills. Both quarterbacks must maintain strong relationships with their fellow backs so they can remain confident in their decisions during a match.
Overall, rugby quarterbacks play an integral part within a team’s success on match days due to their combination of technical abilities and leadership attributes that help guide their teams through matches victoriously.
Centers: #12 and #13
Rugby centers typically line up in the middle of the backline and serve two key roles on the rugby field. First, they are responsible for connecting the forwards to the backs by creating a “bridge” between the two groups. They must be effective in both running and passing, as well as being able to read and react quickly to changes in play. Secondly, centers are relied upon for their tackling ability; they must be able to defend against strong ball carriers and shedding defenders when needed.
Centers wearing numbers 12 and 13 form an important part of any successful team, with each bringing something different to the table. Number 12 is primarily used a “first receiver” or “playmaker” in attack, while number 13 acts as an extra defender when needed. In defense, number 13 will typically move around more than 12, setting up a defensive line that can hold off attackers and stop them from advancing further downfield. In attack, number 12 will call out plays and make sure everyone is running their lines correctly; this player needs good vision and decision making skills in order to create options for his team mates.

In terms of physical attributes, both players should be quick on their feet with excellent coordination skills. They should also have good handling skills and be able to catch high passes accurately even under pressure from opposition defenders. Number 12 will need to turn over possession quickly so having fast hands and good decision-making abilities is important; this player should also have strong communication skills so he can effectively relay instructions from his coach during training sessions or matches. Number 13 should have a wide range of passing options available at all times, so having an accurate kicking game is essential here too!
Centers who wear numbers 12 and 13 have very different responsibilities but together they form an essential part of any successful rugby side; they need a variety of physical attributes as well as excellent tactical knowledge in order to help their team gain an advantage on the field. Their importance cannot be underestimated; without their ability to break down opposition attacks or create opportunities for their teams attack, no team would stand a chance of victory!
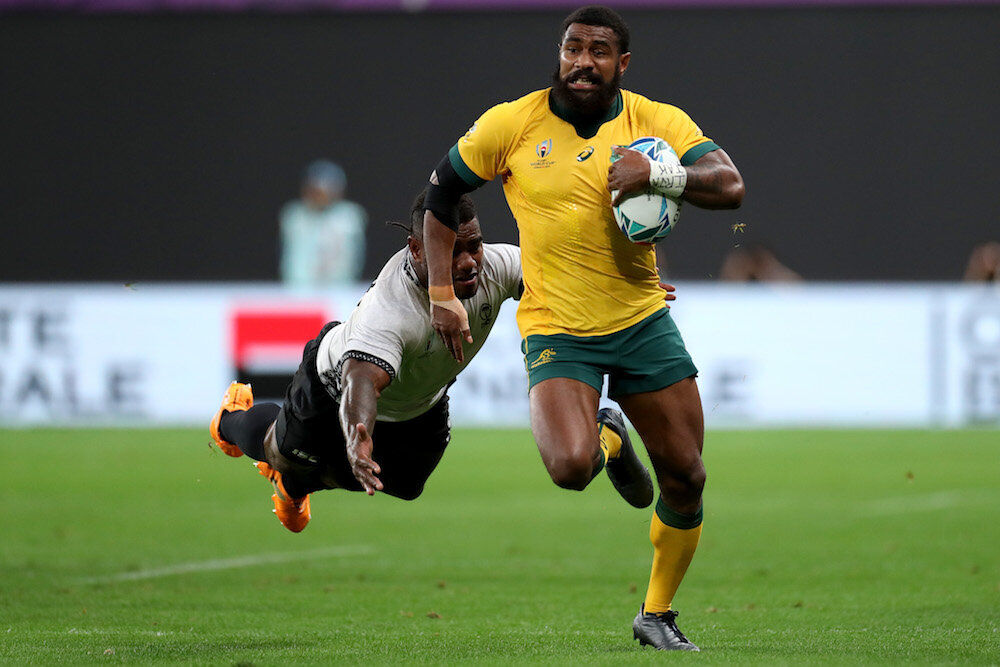
Wings: #11 and #14
Rugby backs, comprised of the “three-quarters” (wings #11 and #14) are some of the most important players on a rugby team. Wings provide much of the team’s offensive prowess and creativity, often determining whether or not the team is able to put points on the board. They need to be fast thinkers who can quickly assess their surrounding and make decisions in an instant.
In order to do this, wings often need to have superior vision when it comes to reading the game. This means having an understanding of how defenders are positioning themselves and being able to anticipate opposing players’ movements before they even happen. This allows wings to find openings in which they can exploit with precise passes or runs at goal. Additionally, agility is essential for wings because they must be able to move around defenders and cover large amounts of ground very quickly.
Beyond just athleticism, wings are expected to understand ball handling skills such as passing, catching and kicking with both feet as well as evading tackles by sidestepping or dodging opponents without violating any laws of the game. They must also possess good communication skills in order to coordinate play with other members of the backline. Once a wing finds open space they must have the composure necessary to deliver accurate passes or take shots at goal while under pressure from defenders.
Ultimately, it takes a special type of athlete to succeed in such a demanding position. Rugby wings must possess both physical attributes such as speed and agility but also mental aptitude that allows them to think quickly under pressure as well as understanding complex strategies like recognizing where opposition’s weak spots are on defense. It is this combination that makes wings so valuable for teams looking for victory.
Fullback: #15
The fullback, or #15, is a critical position in rugby. As the last line of defense, they have to be able to read the game quickly and react to any attacking threats. With great vision and lightning speed, fullbacks are often the difference between success and failure for teams.
Fullbacks need to be excellent kickers who can accurately boot the ball upfield when needed. They should possess strong tackling skills, allowing them to make stops near their goal line and keep opposing teams from scoring. Fullbacks must also possess strong ball-handling abilities in order to help spark counter-attacks and launch counter-kicks when needed. In addition, they should have good passing skills in order to facilitate quick transitions from defense into attack.

When it comes to attacking play, fullbacks are responsible for taking on defenders with their speed and agility while making sure they don’t leave gaps open behind them. They should also be able to spot scoring opportunities early on and be ready to take advantage of them by running side lines or making incisive breaks into the defense line.
Physically, fullbacks need to have strength, stamina and flexibility as they are constantly on the move during matches. They must also possess good balance as they will often jump up for high kicks or land awkwardly after being tackled.
In summary, fullbacks bring a unique blend of pace, agility and vision that makes them invaluable players in rugby teams around the world. With their defensive capabilities coupled with their ability to launch attacks from deep positions, fullbacks are truly one of the most important positions on the field when it comes to winning games of rugby!

Noah Belanger is a seasoned sports bettor with a decade of experience in the industry. He is the driving force behind the test reports and strategies on the LoonieBet Blog. With a unique perspective, Noah writes from the player's point of view, offering firsthand insights and expertise to help readers make informed decisions.
Latest posts by Noah Belanger (see all)
- Super Heinz Betting Explained - April 22, 2024
- Betting Strategies: Heinz Bet Explained - April 18, 2024
- What is a Yankee Bet and How Does it Work - April 17, 2024